
How to make illustrated maps
In this tutorial I'll explain how I make what is the majority of my commercial illustration work : maps.
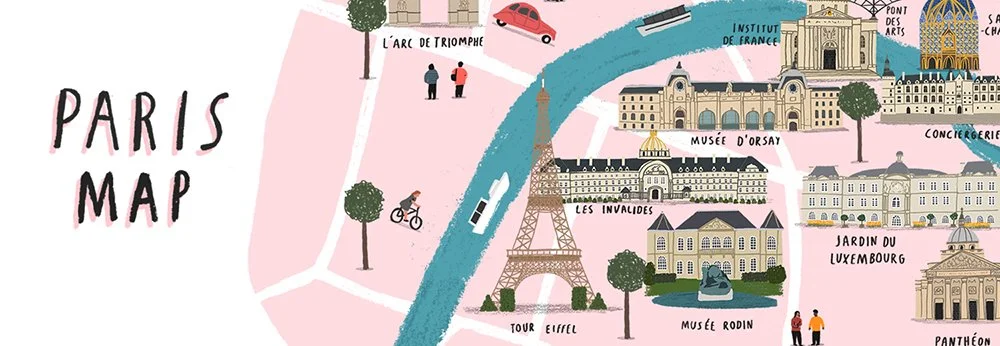
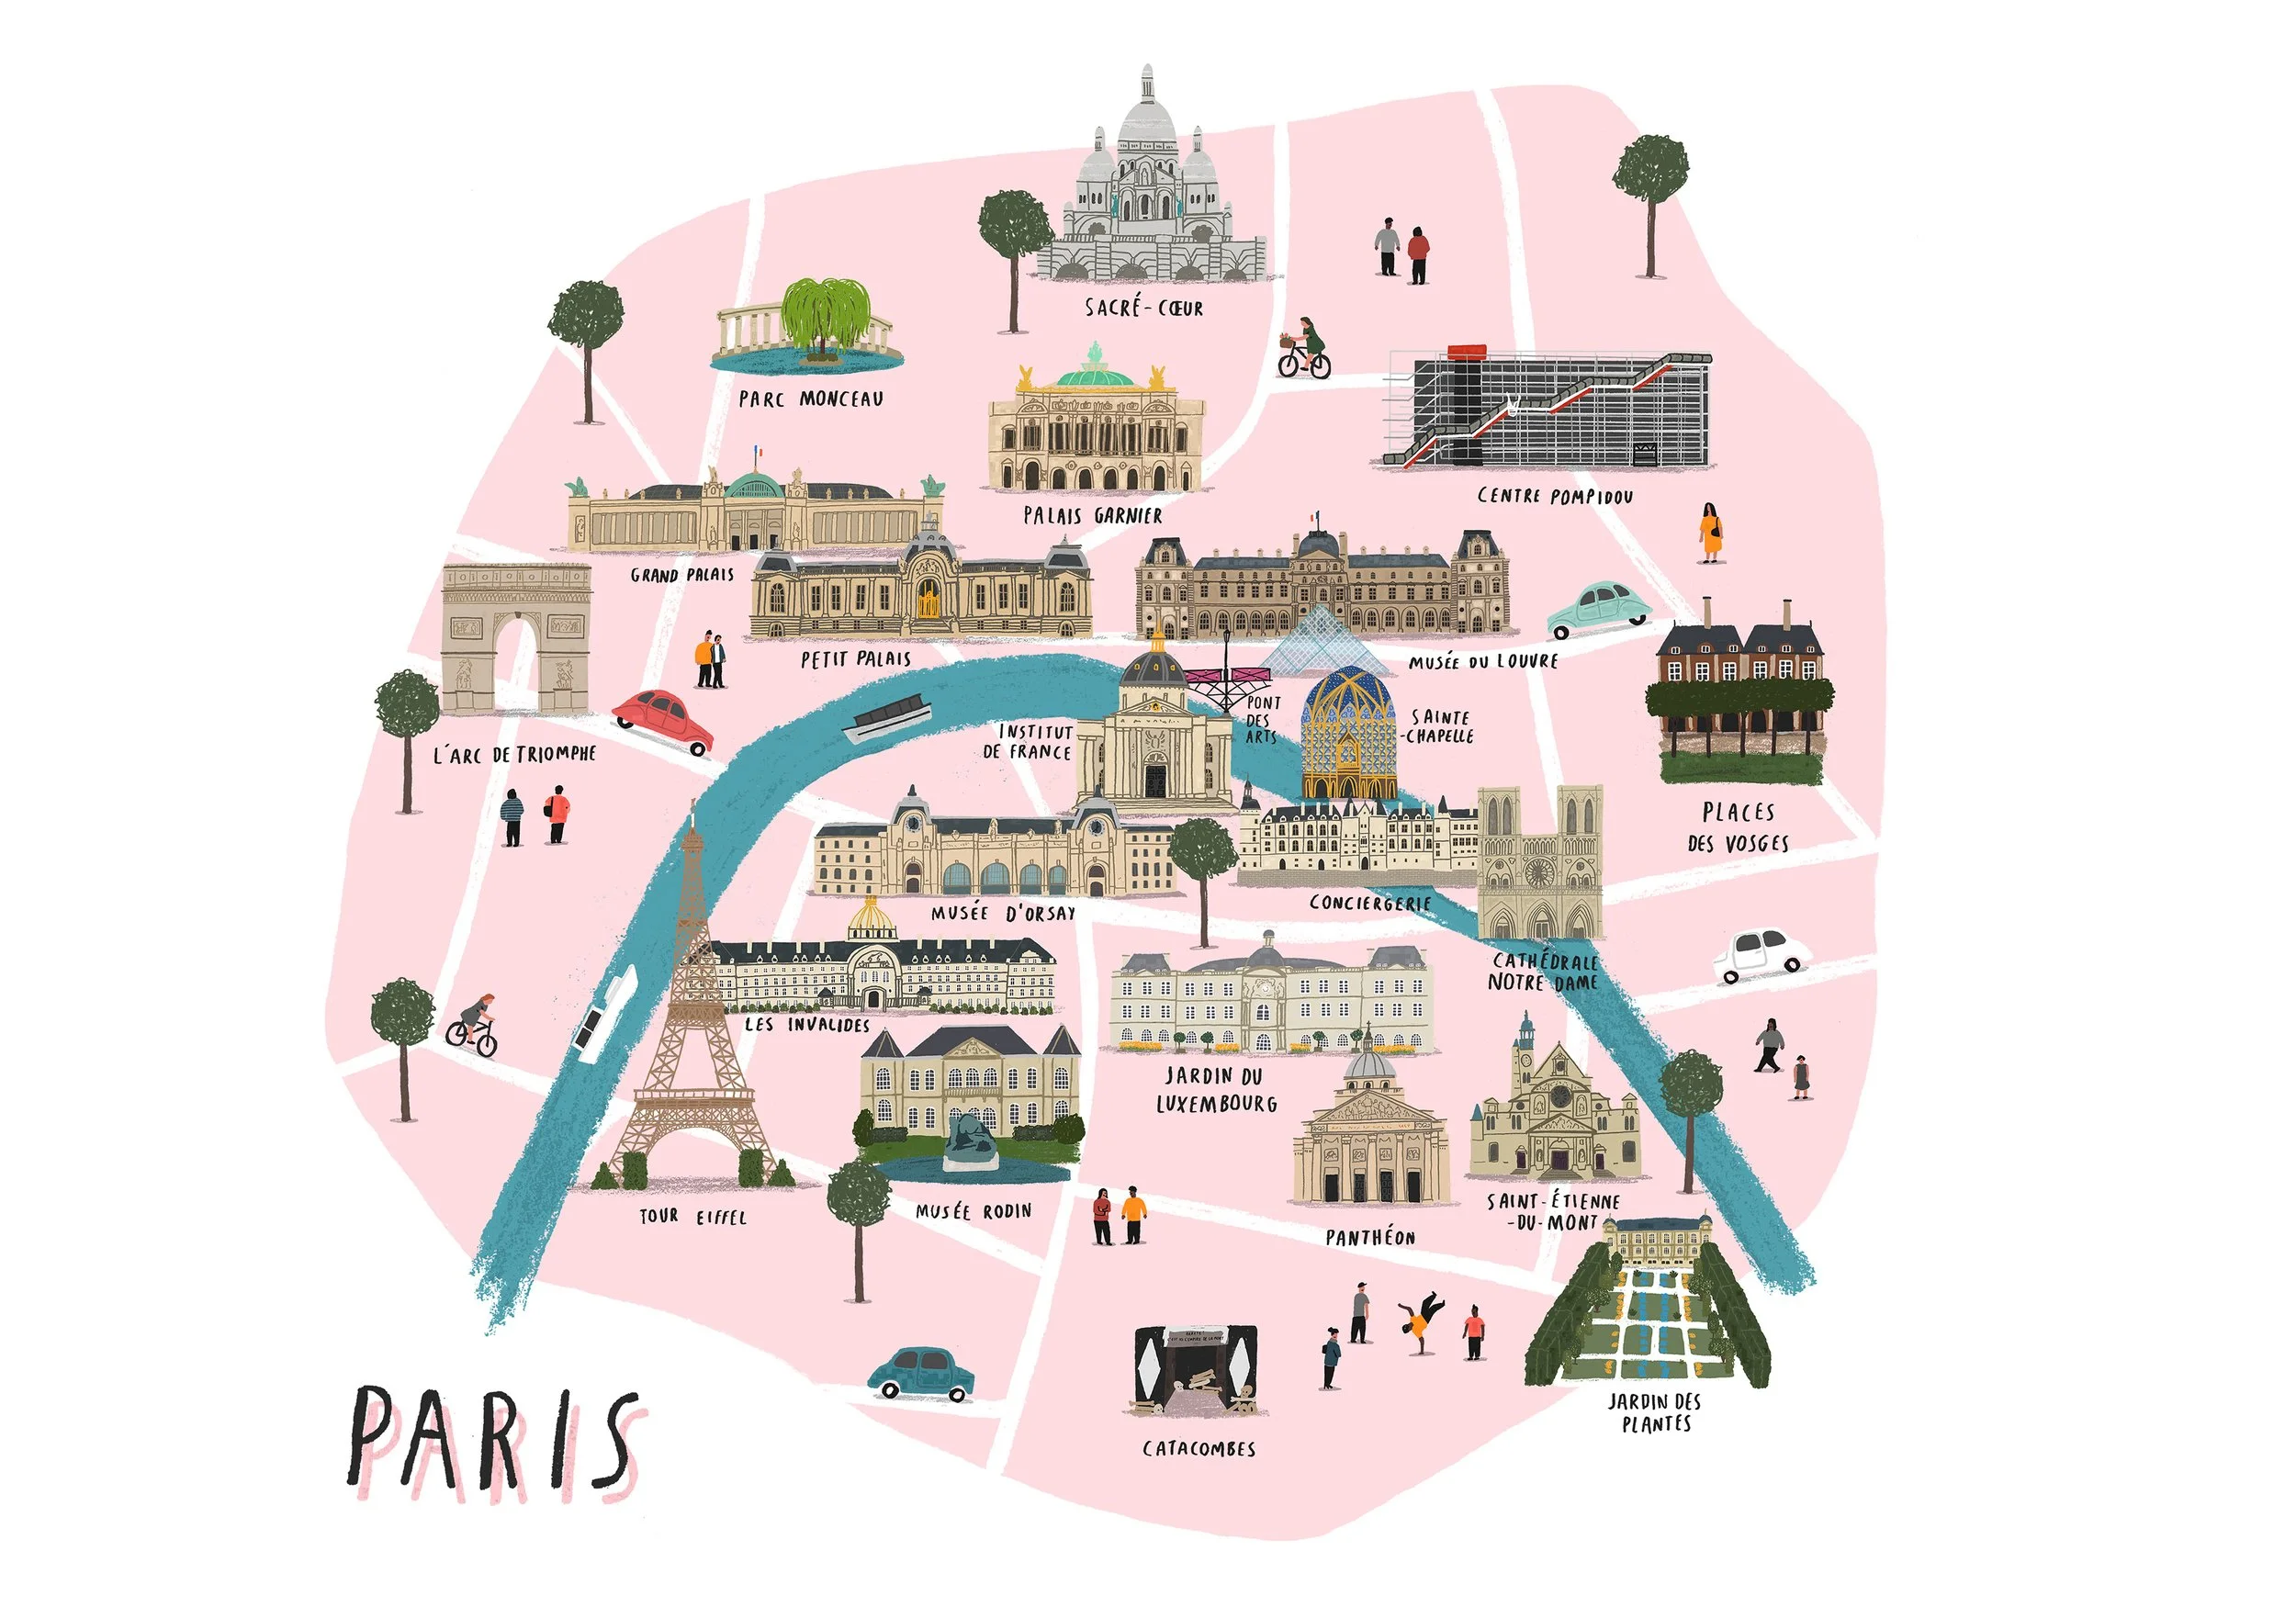
I'll take you through step by step how to make a versatile illustrated map. I'll mostly be using Paris in the examples.
It can be great to invent maps and places like some of the legendary world-builders have done like Tolkien, George R. R. Martin and Roald Dahl have done with their characters and worlds.
But also maps can of course be useful in the real world like in area and city guides. They can be a lovely balance between form and function.
In this article I’ll show you how I make mine, and how you could use these 8 steps to make your own maps in your own styles.
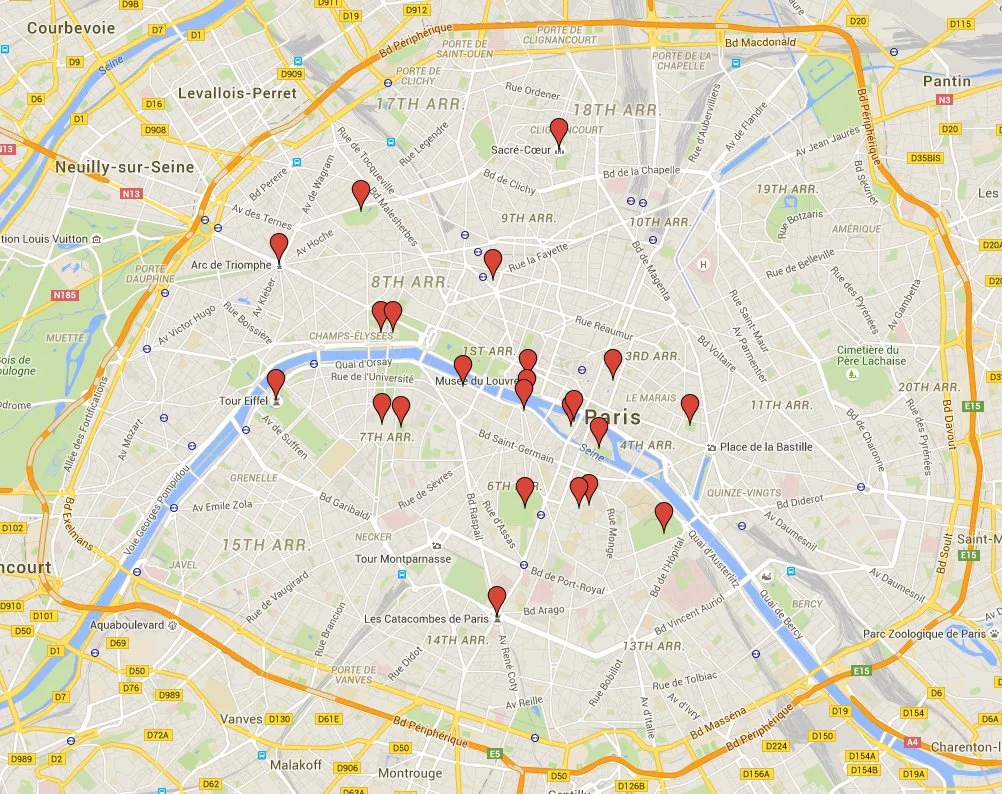
1. Choosing your area
In this case, the area is the city of Paris. The perimeter of the city on the Google Map here has a lovely shape that I'll be incorporating into the design. 'My Maps' (different to the usual maps section), is a great tool to plot and choose your area.
2. Collecting images and research
Many of the places we want to map may be places that aren't possible to visit in real life - so collecting images of the places and making sure you research the place properly can help give you a better idea of what you want to map. Depending on how you want to draw the sites Google image search and Street view can give you great face on images of the places to draw.
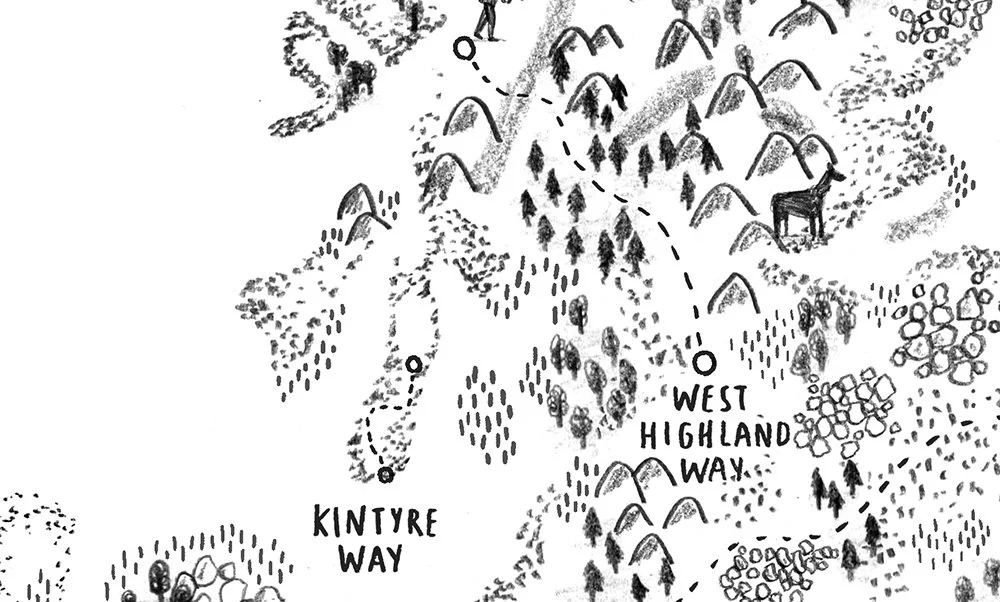
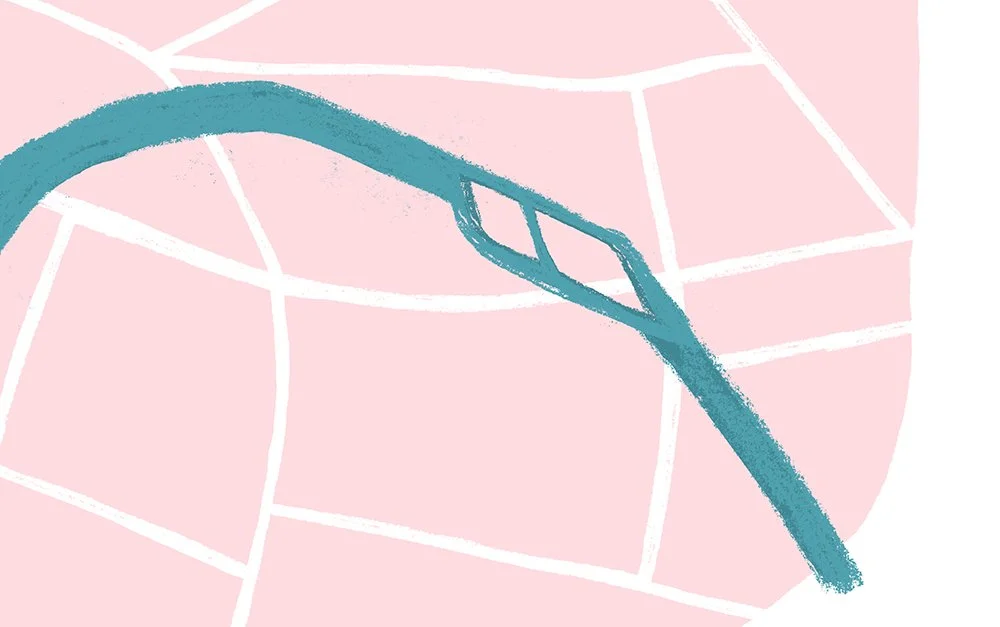
3. Routes and paths
Draw out important routes and paths. This recent rural map here shows one of the selected walking routes of the UK.
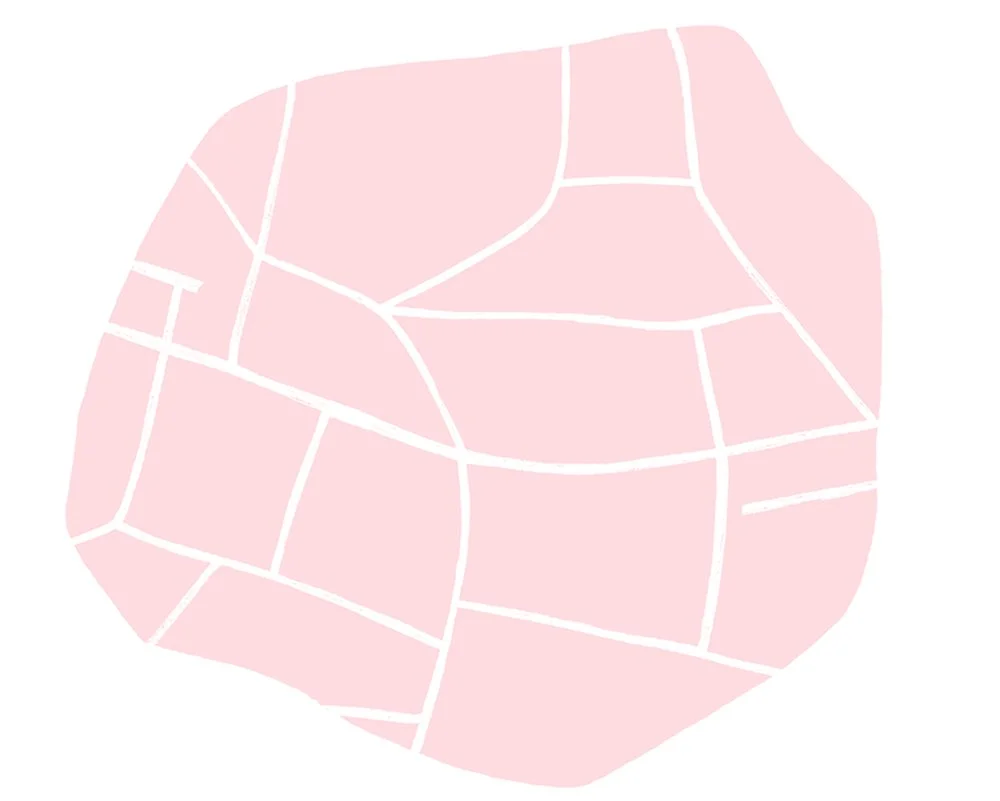
4. Drawing out the main roads
When drawing an urban map, a good place to start is with the general shape of the place, including the main roads. Sometimes the city will provide a border like in the example here, or sometimes there will be rivers or the sea to break up the composition.
5. Smaller roads and routes
After this step it can be useful to add smaller roads, rivers or streams. These can be a different colour to differentiate them from the main roads and other areas.
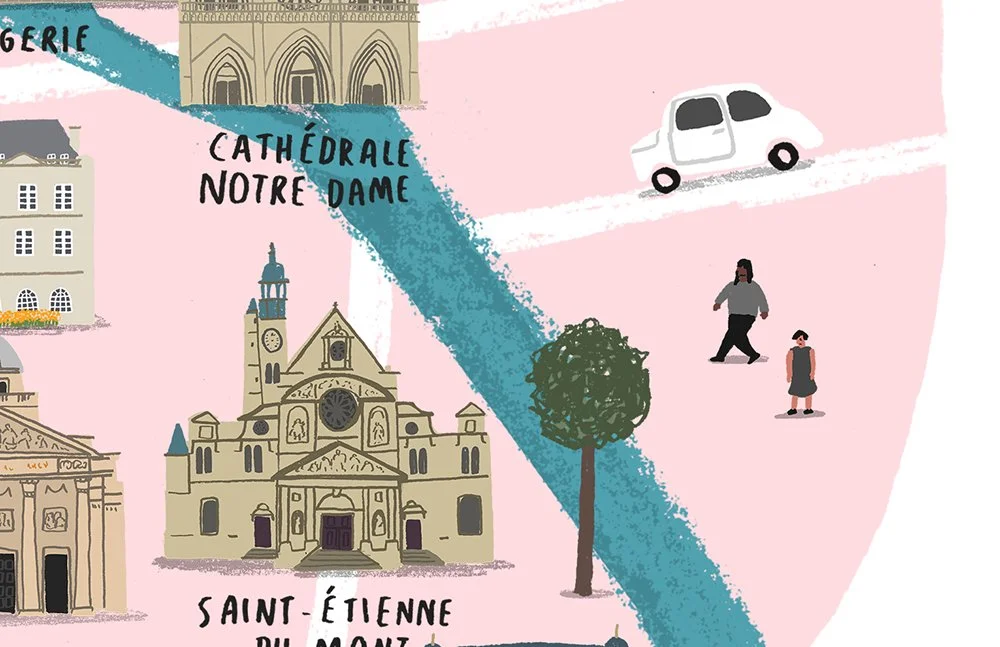
6. Adding places of interest and sites
Now the main areas of the map are there, you can start adding sites and buildings to your map. If like me you are using a layer based software like Photoshop, these can be drawn separately and then dropped on to the map. I find it useful to add them as a 'linked smart object' - This allows resizing and organising the sites without pixellation.

7. Decoration and foliage
Now you have your main sites and places of interest, you can start adding decorations and fun little details to the map. Trees and foliage are something I like to make unique to each map. With so many varieties it can give you loads to work with and interesting shapes and colours.
8. Extras and finishing touches
Finish off your map with a nicely drawn title if using one, and any other details like the inhabitants of the area.


Thanks for reading and if you make a map or this helps your illustrations, please feel free to contact me to ask anything or show me your maps.